
julia stiles nude mrsnatural517
In the past, I have used off the shelf power monitors for checking appliance power consumption at home and for my friends and family. Typically this is an old fridge, freezer, dryer etc.
However, I keep breaking them (yes… it might be me!).
Feeling like I am constantly throwing money away, I set out to build a reliable power monitor for less than $50.
Background
In the past, I have gone through a few of the Elto EMA-1 power monitors which can be picked up for around $25 from Mitre 10 and online.
They are a pretty useful device, rated for loads up to 10A. However, for me, they haven’t lasted that long. Typically with the screen failing or the power monitor unit refusing to turn on after 12 – 18 months.
So, I wanted to build something more flexible and more reliable.
My Power Monitor Requirements?
Simplicity. Mainly.
I have used a number of power monitors and loggers over the years, from $25 up to many thousands for commercial grade power-quality loggers.
For home use, my main power monitor requirements were:
- Off-the-shelf parts
- Simple to use
- Robust and reliable, and
- Less than $50 to build.
Finding Parts
My favourite site for random electronics is Banggood. If you haven’t come across Banggood before, it’s a reliable Chinese site that is kind of like Amazon and Ebay had a baby. It sells an amazing array of useful and truly strange stuff.
Power Monitor Brains – Peacefair PZEM-061
There are quite a few different power monitor modules/panels on Banggood from $10 to $30.
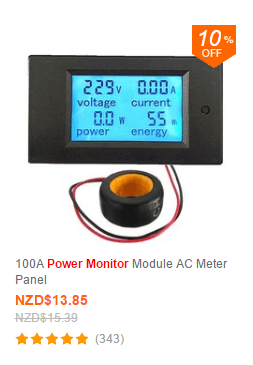
I ended up settling on the most commonly purchased module, the Peacefair PZEM-061. This has a current rating up to 100 Amps AC, which is a lot more than the 10A rating of the Elto unit.
In the box, you get the module, CT and basic wiring instructions all for $13.85 delivered to my home in NZ. Deal.
Power In & Power Out
I wanted to be able to plug a device or two directly into my power monitor (similar to retail devices like the EMA-1) and also have a decent power lead so I could rest the monitor somewhere convenient.
Popping down to the local Bunnings store, I picked up the following items:
- DETA double powerpoint – $7.88 incl. GST
- Arlec 2m extension lead – $2.96 incl. GST

Hobby Box
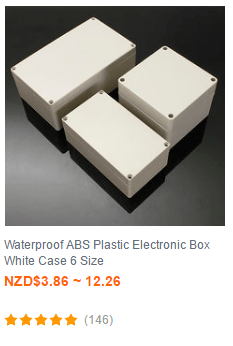
To put everything together I looked at a few options before settling on the typical ABS plastic hobby box for electronic projects.
As I was impatient, I initially purchased a dark grey ABS box from our local Jaycar store for $30, which formed the basis for my first monitor. To save money, I purchased a second from Banggood for $11.24.
Total Cost
The total cost for the power monitor was $35.93 plus a 10-day wait for the key parts to arrive from China.
Putting It All Together
If you are not comfortable with wiring up electronics at mains voltage, I would not recommend doing this yourself.
I have spent some time as a residential electrician, so am more than comfortable myself.
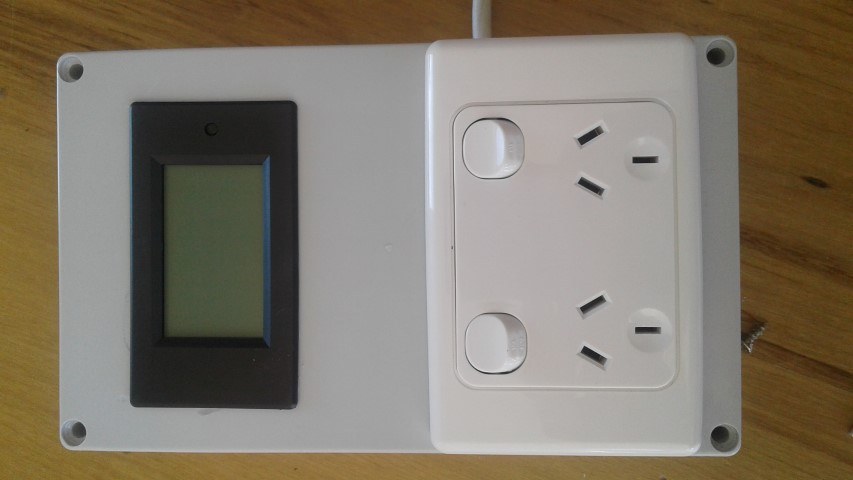
I cut two holes in the front panel of the hobby box to mount the screen and powerpoint. Then I drilled a hole in the side slightly larger than the diameter of the power cord, chopped off the female plug and fed the end through.
Here’s the box before the internal wiring is completed:
Next came the internal wiring. I did have a wiring diagram on this page – but removed it due to a flurry of comments about it being now incorrect for the latest Peacefair units. Please ensure that you carefully follow the diagram which suits your unit.
Note that the measurement module power should be taken off before the CT, to avoid the module measuring its own power consumption. I made this mistake initially, powering the module from the powerpoint – this adds approx 1 Watt to the load measured. Not a lot but it adds up over time.
Finally, electrical insulation and safety testing of the appliance before putting into service. All good!
Final Thoughts
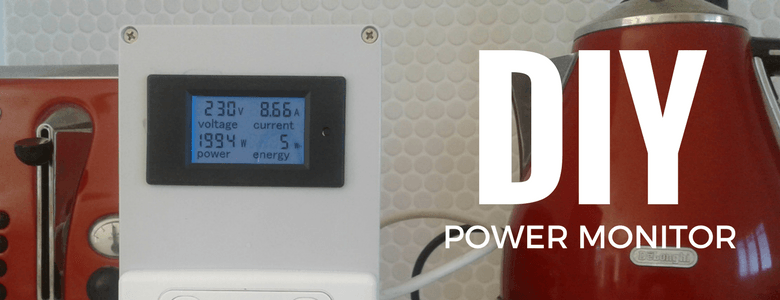
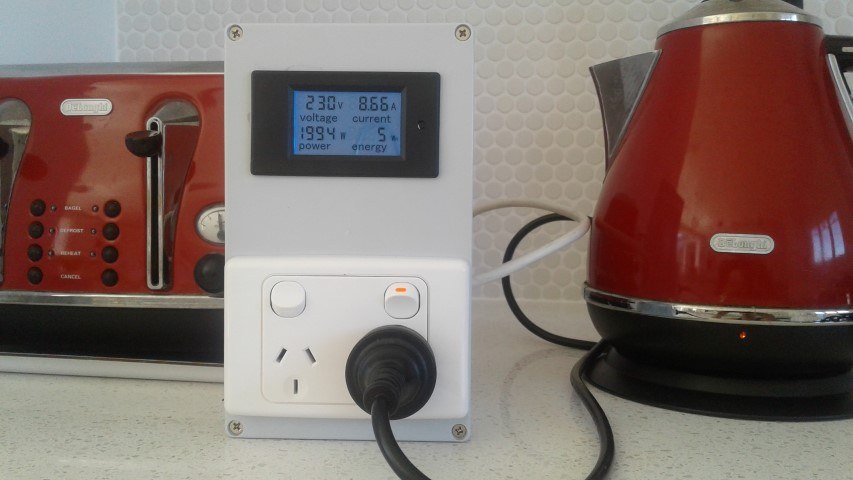
I’m very happy with how the power monitor has turned out. Below is a picture of the finished unit in operation, measuring our kitchen kettle.
The price was well within budget at only $35.93 for the parts. This was only a few dollars more than the unit I was looking to replace and it both looks and feels a whole lot more robust.
– TPG
Wrong wiring for pin 1 and pin 3, please swap the pin 1 and pin 3.
Hi Tsang – Great spotting. You are absolutely correct, wiring diagram had an error which I have fixed now. Cheers, Nathan
How good have you found the calibration of the power meter module, and how accurately does it read with complex loads like switch mode power supplies, motors etc. Is it true RMS reading?
Honestly, I haven’t cross-checked it against a Fluke or similar. I was looking for insights from typical household appliances and aggregated loads over a long period of time. I would expect it to perform relatively poorly with more complex loads, but might be surprised. Let me know if you get one of the modules and do any testing! Cheers, Nathan
Hi Nathan,
Useful diy guide, thanks!
My question is are you aware of any power monitoring products that don’t require being plugged inline? I want to measure a water cylinders usage fit about a month, and don’t want to have to pay a sparky to change from hardwired to three pin plug (and back).
Cheers.
Hi Adam,
If you are comfortable doing so, the Peacefair monitor could be wired up to do this. You would need to disconnect the hot water cylinder and slip the CT over either the phase or neutral wire within the power cable, then wire it back up again. Provide power to the Peacefair unit from another source, and the CT measures power flowing through the hot water cylinder cable.
Alternatively, if you are looking for a more ‘off the shelf’ solution you could try a Clamp Meter (Google it) which is basically a multimeter with an integral CT that clips (clamps) around a cable. Again, you’ll need to be able to access either the phase or neutral wires individually. This will tell you instantaneous current, but may not do the longer term monitoring.
There are some domestic house monitoring units with clip over CTs, but they tend to be more focused on commercial customers and are freaking expensive ($500+), or have monthly monitoring charges, or both.
If it was me, I’d try using the Peacefair unit.
Cheers,
Nathan
The alliexpress site says it works at 220v. Is this a problem with nz at 240v..
I too would like to use it to measure my hwc consumption.
Thanks
220/230/240V – same same. It’ll be fine. Just don’t get 110V version.
Sorry Nathan. Another question.
Does the Peacefair PZEM-061 show the kw used and have a reset button?
Thanks
Todd
Hi Todd. Check out the very bottom photo. Voltage, Current, Power readings are instantaneous. Energy is cumulative – and is reset by round button in right hand side. Cheers, Nathan
Hi Looks great, What are the outside dimensions of the box Please, my supplier is confused about a size 6 box ? do you have a link on where I can get it Thanks
Cheers
Steve
Hi Steve. I have one Jaycar box and one Banggood box. I think they are called hobby boxes. Dimensions of my ones are approx 200mm h x 150 w x 60 d. Cheers, Nathan
Thank you Nathan. Just ordered the parts to make my own one.
I really would like to know how accurate this is as I am looking for a device that measures the draw of my computer under various conditions, how would you calibrate such a device?
Hi Chasse. I haven’t tested this DIY meter against anything else, but common sense tells me it’s reasonably accurate (+/- 3% or better) which suits my needs perfectly. For example a 2kW rated kettle measures at basically 2kW. My main requirement is measuring kWh over time (i.e. cumulative consumption over a couple of days). If you are looking to run your PC under different load conditions and measure the instantaneous power consumption or measuring low loads (say less than 50W) I would suggest a clamp meter (google ‘Fluke Clamp Meter’ for example) would best suit your purposes. A brand name clamp meter should be very accurate. Cheers, Nathan
I was just looking at the details for the PZEM-061 and read the following. I was looking at this for measuring the amount of power drawn by my computer from the wall socket, reading the details below ( I’m not electronically minded and don’t know the math behind it ) is it safe to do so? I can’t tell if they are talking about not using a micro to control it or if it shouldn’t be used on anything with a silicon chip in it which seems a bit absurd.
=== COPIED TEXT ===
4. It can’t be used in some circuit such as inverter or silicon controlled.
Note: There are three types of power: active power (P represents / unit W), reactive power (Q represents / unit Var), apparent power (S represents / unit VA). And the power of our product is active power. Active power is calculated as: P = U * I * cosφ, cosφ represents the power factor, for purely resistive loads (such as incandescent, heater, etc.) the power factor is generally close to 1, for inductive load and capacitive load, the power factor is between 0-1; so when you test the purely resistive load, the power(P) is substantially equal to or close to U * I; but when you test inductive or capacitive loads (such as refrigerators, washing machines, televisions, computers, etc.), P <U * I . As for the specific number is related to the power factor, for each appliance has different power factor, so please believe the value of our product.
Hi Chuck. If you’re not electrically minded, I would caution against going down the path of a DIY power monitor. Buy a ready-made power monitor online, it will be faster, easier and safer for you.
To answer your question, the text you have copied/pasted appears to say the Peacefair chip doesn’t measure reactive power (power transfer inefficiency caused by the physics of the connected device/appliance). This is NOT an issue, as your home power meter doesn’t measure reactive power either! It’s not worth it. They both assume all the power consumed in a home environment is active or ‘real’ power. I’m not worried about this. You don’t need to be worried about this. It’s very minor and only really important for industrial power consumers or if you own a building with large amounts of fluro lighting etc.
Regarding whether the power monitor is safe to use to measure your computer. Yes. But again, I would recommend you just consider buying an off the shelf power monitor.
Hope this helps somewhat.
Cheers, Nathan
Like Adam above, I’m keen to measure my hot water cylinder’s power usage. The cylinder is wired directly into the mains (I assume this is a legal requirement). That’s got me thinking about induction for measuring usage.
I’ve seen a number of induction-based clamp meters such as https://www.supercheapauto.co.nz/p/toolpro-toolpro-ac-dc-digital-clamp-meter-400a-600v/636959.html but they are all designed for instantaneous usage. My interest is in how much I’m spending on hot water over a month, or more specifically does a hot water heat pump stack up for me. Even if the clamp can calculate averages, the whole thing feels a bit mickey mouse.
Another idea I had was to go back to the meter board, for example something like https://www.aliexpress.com/item/1005005114262551.html looks really good. My only hesitation is I’ve never touched the board before and don’t know what’s involved. It feels the sort of thing where I’d want an electrician.
What do you think?